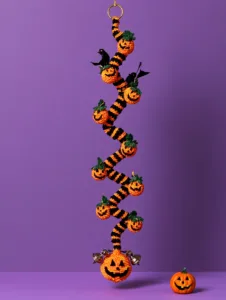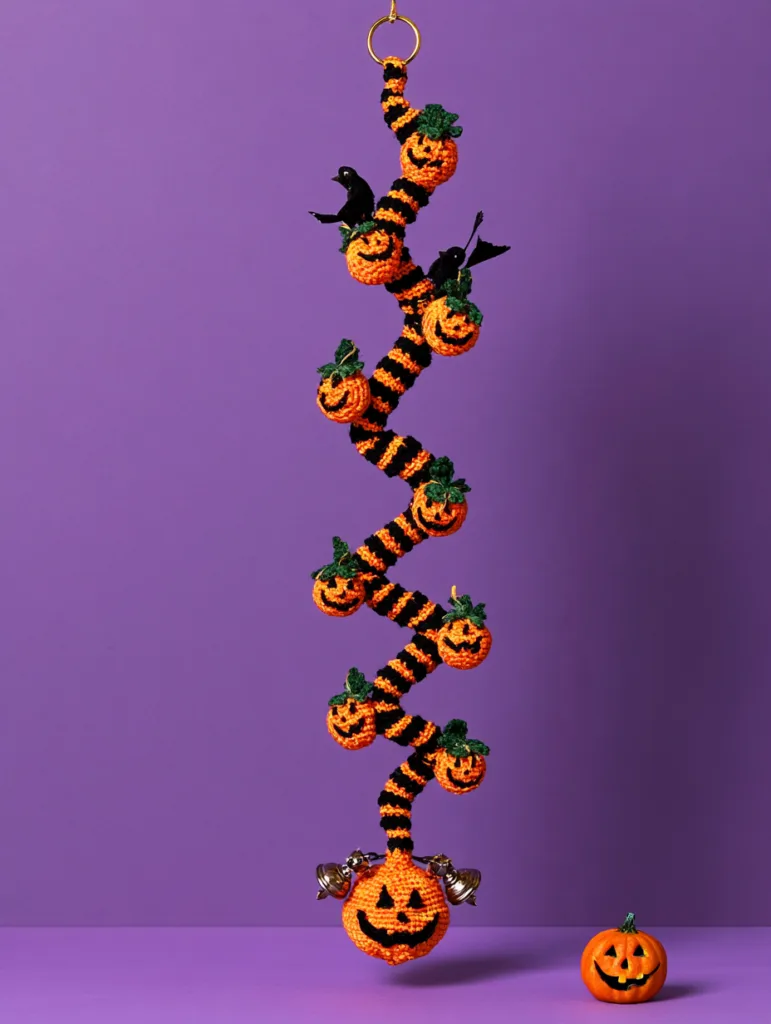
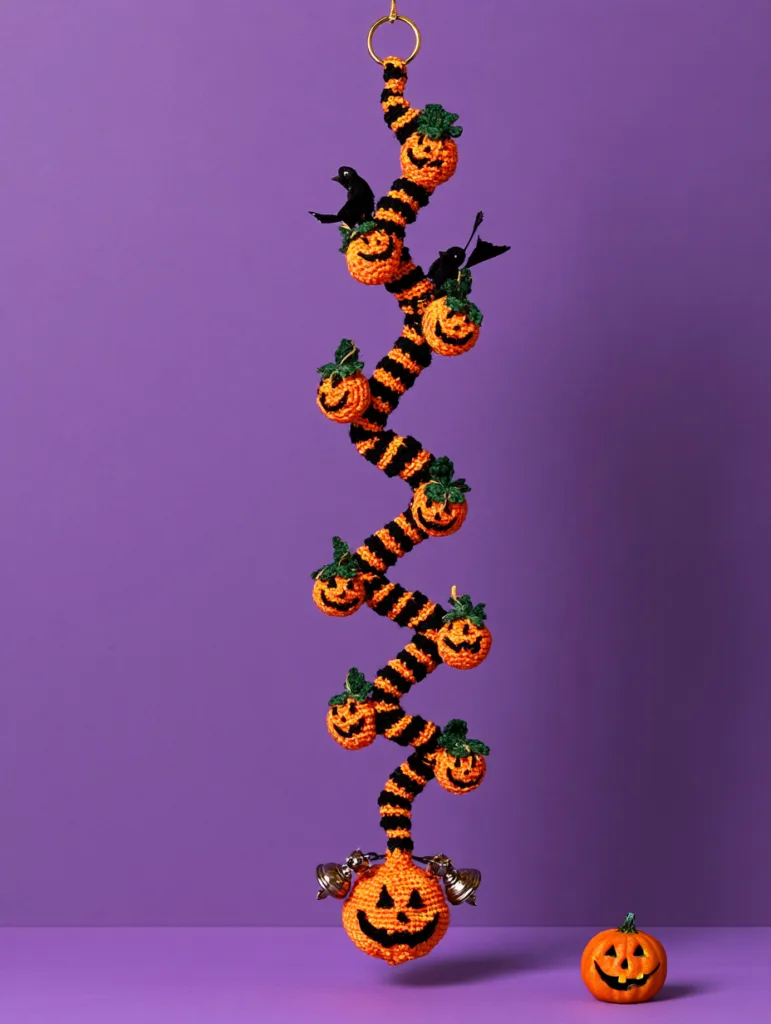
Bring a little handmade Halloween magic to your porch, garden, or front door with this Halloween Crochet Wind Spinner Pattern. It is a fun seasonal project that uses simple stitches to create a curly, spiral decoration with a cute crocheted pumpkin at the bottom.
I have always loved handmade decorations because they make a holiday feel warmer and more personal. My grandmother used to believe that even the smallest handmade detail could transform a room. That idea inspired this spooky little crochet project.
This Halloween Crochet Wind Spinner Pattern is quick to make, easy to customize, and perfect for using up small amounts of orange, black, and green yarn.
Why You’ll Love This Halloween Crochet Wind Spinner
This Halloween Crochet Wind Spinner Pattern is designed with simplicity in mind.
You will love it because:
- It uses basic crochet stitches.
- It is suitable for confident beginners.
- It works up quickly.
- You can customize the colors.
- It makes a cute Halloween porch decoration.
- It can be made in different lengths.
- The pumpkin charm adds an adorable finishing touch.
- It is a great handmade Halloween gift.
The finished spinner has a naturally ruffled, curly shape. When hung from a porch, covered patio, doorway, or garden hook, the spiral shape moves gently with the air.
Finished Size
The finished Halloween Crochet Wind Spinner Pattern measures approximately:
- Length: 22–28 inches
- Pumpkin: approximately 2–2½ inches wide
- Difficulty: Easy
- Crochet terminology: US terms
The final size will vary depending on your yarn, hook size, and tension.
Materials You’ll Need
For this Halloween Crochet Wind Spinner Pattern, gather the following:
- Medium-weight yarn in orange
- Small amount of black yarn
- Small amount of green or brown yarn
- 4 mm crochet hook
- Yarn needle
- Scissors
- Fiberfill stuffing
- Stitch marker, optional
- Small wooden bead or lightweight decorative bead, optional
I recommend medium-weight yarn because it gives the spiral enough structure while still allowing it to curl naturally. If you’re new to crochet, medium-weight yarn can also make individual stitches easier to see.
Crochet Abbreviations
This pattern uses standard US crochet terminology. The Craft Yarn Council provides a useful reference for common crochet abbreviations and terminology.
| Abbreviation | Meaning |
|---|---|
| ch | chain |
| dc | double crochet |
| sc | single crochet |
| sl st | slip stitch |
| inc | increase |
| dec | decrease |
| st | stitch |
| MR | magic ring |
Note: UK crochet terminology uses different names for some stitches, so check your pattern terminology before beginning.
Halloween Crochet Wind Spinner Pattern
Step 1: Make the Spiral Base
Begin with orange yarn.
Ch 61.
Work 1 dc into the 4th chain from the hook.
Then work 2 dc into each remaining chain across.
Fasten off, leaving a yarn tail long enough to weave in.
Your piece should naturally begin to curl and ruffle.
Tip
Don’t worry if the strip looks overly curly or uneven at this stage. That is exactly what we want.
The extra stitches are what create the decorative spiral effect.
Gently stretch the strip lengthwise with your fingers. You should see a long, wavy shape beginning to form.
Step 2: Create the Hanging Loop
Switch to black yarn if you want a contrasting top section.
Cut approximately 10 inches of black yarn.
Fold the yarn in half and use it to create a small hanging loop at the top of the orange spiral.
Secure it firmly through several stitches.
For a stronger hanger, you can crochet a small chain instead:
Ch 15, sl st into the first chain.
Attach the resulting loop securely to the top of your spiral.
Make sure the loop is firmly attached before hanging the decoration outdoors.
Step 3: Crochet the Halloween Pumpkin
Now let’s make the little pumpkin that hangs from the bottom.
Using orange yarn, make a magic ring.
Round 1
Work 6 sc into the magic ring.
Pull the ring closed.
Round 2
Work 2 sc in each stitch around.
You should have 12 stitches.
Round 3
Repeat:
Sc in next stitch, 2 sc in next stitch.
Repeat around.
You should have 18 stitches.
Round 4
Repeat:
Sc in next 2 stitches, 2 sc in next stitch.
Repeat around.
You should have 24 stitches.
Rounds 5–6
Sc in each stitch around.
Do not fasten off.
Round 7
Repeat:
Sc in next 2 stitches, sc2tog.
Repeat around.
You should have 18 stitches.
Round 8
Repeat:
Sc in next stitch, sc2tog.
Repeat around.
You should have 12 stitches.
Add a small amount of fiberfill stuffing.
Don’t overstuff the pumpkin. A slightly soft pumpkin looks more natural and gives you room to shape it.
Round 9
Work sc2tog around.
You should have approximately 6 stitches.
Fasten off and close the opening.
Weave in the yarn end.
Step 4: Add the Pumpkin Stem
Using green or brown yarn, attach your yarn to the top of the pumpkin.
Ch 4.
Slip stitch back down the chain.
Fasten off and weave in the ends.
You can also make a tiny green leaf by chaining 4 and working a few slip stitches around the chain.
This little detail gives your Halloween Crochet Wind Spinner Pattern a more finished look.
Step 5: Add a Spooky Face
Now comes the fun part.
Using black yarn and a yarn needle, embroider a simple Jack-o’-lantern face onto the pumpkin.
Try:
- Triangle eyes
- A tiny triangle nose
- A smiling zigzag mouth
You don’t need to make the face perfectly symmetrical. Handmade Halloween decorations look especially charming when they have a little personality.
For a different style, skip the face completely and make a plain orange pumpkin.
Step 6: Attach the Pumpkin to the Spinner
Take the bottom end of your spiral.
Position the pumpkin underneath it.
Using orange or black yarn, sew the top of the pumpkin securely to the final stitches of the spiral.
If you want your spinner to hang more vertically, add a small wooden bead below the pumpkin for a little extra weight.
Keep any added decorations lightweight so the spiral can still move freely.
Step 7: Shape Your Halloween Crochet Wind Spinner
This is the final step that brings the project to life.
Hold the spinner from the hanging loop.
Gently pull the bottom downward.
Use your fingers to separate the curls until the spiral hangs evenly.
You can twist individual sections slightly to create a more dramatic corkscrew shape.
If your spinner looks too flat, gently twist the strip around your fingers and release it.
Avoid pulling too aggressively because you want to preserve the natural curl of the stitches.
How to Customize Your Halloween Crochet Wind Spinner
One of the best things about this Halloween Crochet Wind Spinner Pattern is how easy it is to personalize.
Make a Black and Orange Spinner
Instead of making the entire spiral orange, alternate orange and black sections.
This gives you a classic Halloween color combination.
Add Purple
Purple yarn gives the decoration a slightly magical Halloween feel.
Try:
- Orange
- Black
- Purple
for a fun witchy color palette.
Make a Ghost Spinner
Replace the pumpkin with a small white ghost.
Use black embroidery yarn to add two eyes and a tiny spooky mouth.
Add Bats
Make several tiny black crochet bats and sew them along the spiral.
This creates a fun flying-bat effect when the spinner moves.
Make a Longer Spinner
For a larger porch decoration, increase the foundation chain.
Try:
Ch 81 or Ch 101
instead of 61.
The longer your foundation chain, the longer your finished decoration will be.
Tips for Getting the Best Spiral Shape
The most important part of this Halloween Crochet Wind Spinner Pattern is getting the spiral to curl.
Here are a few helpful tips:
1. Keep Your Tension Consistent
Very loose tension can make the spiral floppy, while very tight tension can make it difficult to achieve the desired ruffle.
2. Don’t Flatten the Strip
The curling effect is intentional. Don’t try to press the strip completely flat.
3. Use a Slightly Smaller Hook
If your spiral isn’t curling enough, try going down by 0.5 mm.
4. Add More Increases
For an even more dramatic ruffle, experiment with adding additional stitches along the foundation chain.
5. Shape It by Hand
Once finished, gently twist and stretch the spiral until you are happy with the shape.
If you’re still learning basic stitches, resources such as Lion Brand’s crochet video library provide tutorials for chains, single crochet, double crochet, increases, and other techniques.
Where to Hang Your Halloween Crochet Wind Spinner
Your finished Halloween Crochet Wind Spinner Pattern can be used in several places around your home.
Try hanging it:
- On your front porch
- Beside the front door
- From a covered balcony
- Near a window
- On a garden hook
- From a covered patio
- Along a Halloween party backdrop
- In a child’s bedroom
For outdoor use, remember that yarn can be affected by rain, moisture, dirt, and prolonged sunlight. A covered location will help your handmade decoration stay attractive for longer.
How to Make Several Halloween Wind Spinners
Want to create a complete Halloween display?
Make three or five spinners in different lengths.
For example:
- Small: 41-chain foundation
- Medium: 61-chain foundation
- Large: 81-chain foundation
Use different colors for each one.
You could make:
Orange + Black + Purple
or
Black + White + Orange
Hang them at slightly different heights for a layered Halloween decoration.
This is also a wonderful way to use leftover yarn from previous crochet projects.
Frequently Asked Questions
Is this Halloween Crochet Wind Spinner Pattern beginner-friendly?
Yes. The main spiral uses a foundation chain and double crochet increases. The pumpkin uses basic single crochet increases and decreases.
How long does the project take?
Most crocheters should be able to complete one spinner in approximately 1–2 hours, depending on experience and how much detail they add.
Can I use different yarn?
Absolutely. You can experiment with different yarn weights and fibers. Keep in mind that changing yarn and hook size will change the finished size and drape.
Can I make the spinner longer?
Yes. Simply make a longer foundation chain. An 81- or 101-chain foundation will create a longer decoration.
Can I use this pattern for Halloween gifts?
Definitely. Make several in different colors and give them as handmade Halloween decorations.
Can I hang it outdoors?
Yes, but a covered outdoor location is preferable. Prolonged exposure to rain and strong sunlight can affect yarn and handmade decorations.
I love projects like this because they don’t require a huge amount of yarn or complicated techniques to make an impact.
This Halloween Crochet Wind Spinner Pattern turns a few simple stitches into something playful, festive, and completely handmade. Add a smiling pumpkin, experiment with spooky colors, or create a whole collection of spiraling decorations for your porch.
And remember, don’t be afraid to make it your own. Change the colors, add bats, replace the pumpkin with a ghost, or make the spiral extra long.
That’s the beauty of crochet: the pattern gives you a starting point, but your own creativity gives the finished piece its personality.
If you make this Halloween Crochet Wind Spinner Pattern, I’d love to know how you customized yours. Did you choose classic orange and black, or did you create something completely different?
Print
Easy Halloween Crochet Wind Spinner Pattern: 7 Spooky Steps
Description
Make a festive Halloween crochet wind spinner with an easy spiral pattern, spooky colors, and a cute pumpkin charm for fall decorating.